
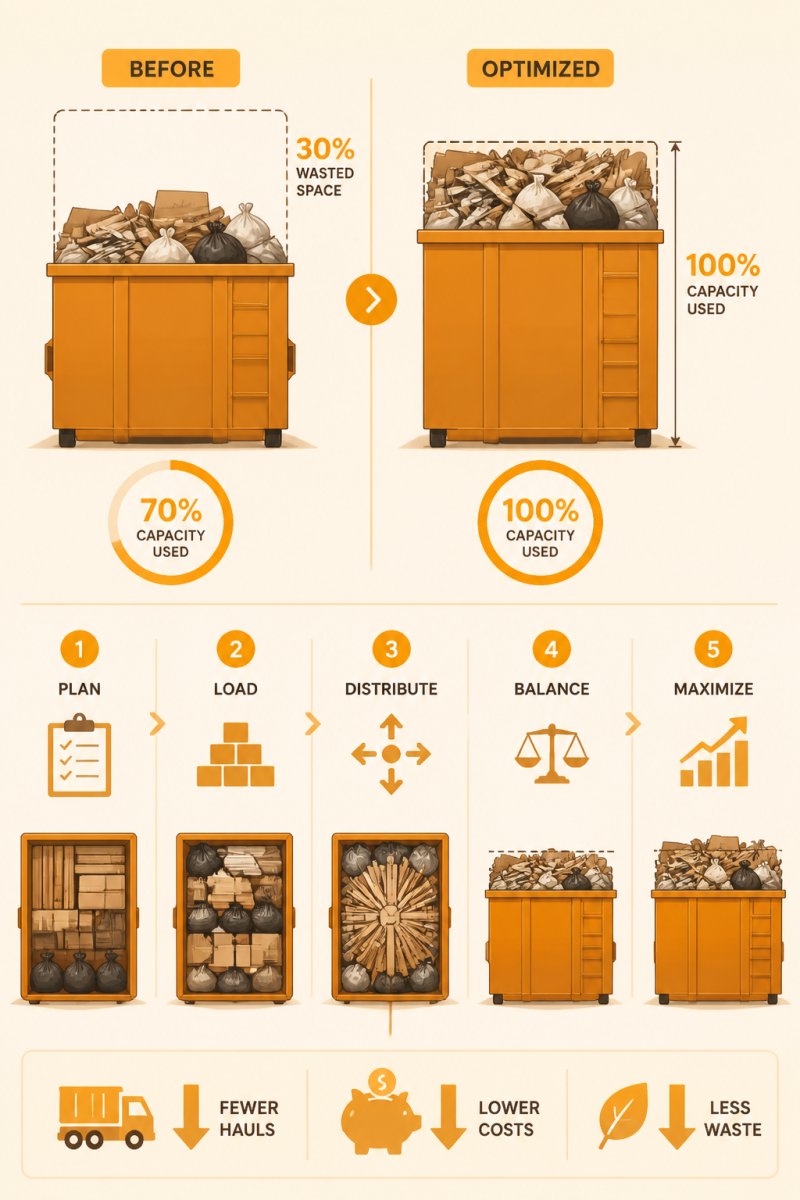
Optimize Jobsite Dumpster Capacity: A How-To Guide
Table of Contents
- Why Optimizing Jobsite Dumpster Capacity Matters
- Assess Your Waste Stream and Container Capacity
- Master Strategic Loading Techniques to Maximize Capacity
- Understanding On-Site Dumpster Compaction Benefits
- Dumpster Rental Costs and How to Reduce Them
- Construction Waste Management Best Practices
- Common Mistakes to Avoid When Loading Dumpsters
- Conclusion
- Frequently Asked Questions
Last Updated: September 25, 2026
Why Optimizing Jobsite Dumpster Capacity Matters
Every wasted cubic yard costs money. Every half-empty haul costs more. When you optimize dumpster capacity on your jobsite, you cut waste management expenses and improve operational flow.
Most project managers don't think about this until the bills arrive. By then, they've already paid for multiple hauls with air gaps, overstuffed containers, and poor planning. The fix isn't complicated, it's strategic.
At Junk Crusher, we work with construction crews and facility managers across Western Pennsylvania who face the same challenge: how to fit more debris into each container without exceeding weight limits or safety standards. The answer lies in understanding your waste stream, mastering loading techniques, and planning across project phases.
This guide walks you through proven methods to maximize every cubic yard. You'll learn how to calculate capacity, load strategically, and reduce unnecessary hauls, all while staying within regulations and safety guidelines.
Assess Your Waste Stream and Container Capacity
Before you load a single piece of debris, know what you're working with. Different materials have different densities. Shingles weigh more than drywall. Concrete weighs more than wood. Understanding your waste stream determines how much you can actually fit.
Calculate cubic yardage and weight limits
Start with the basics: your dumpster's cubic yardage and weight capacity. A standard roll-off dumpster holds a specific volume. The weight limit is separate and equally important.
Cubic yardage tells you the volume available. Weight limits tell you when you've hit the maximum, regardless of empty space remaining. We also offer 20 and 25 yard dumpsters. Weight limits depend on the container size and local regulations.
Calculate your actual available capacity by understanding both numbers:
- Volume capacity: measured in cubic yards (the physical space)
- Weight capacity: measured in tons (the maximum load allowed)
- Limiting factor: whichever you hit first becomes your real capacity
Example: A dumpster might hold a specific volume but only support a certain weight.
Identify material density and segregation needs
Different debris types have different densities. This directly impacts how much you can fit.
Common construction debris densities:
- Shingles and roofing material: 800-1,200 pounds per cubic yard (heavy)
- Concrete and masonry: 1,200-1,600 pounds per cubic yard (very heavy)
- Drywall: 300-500 pounds per cubic yard (light)
- Wood framing and studs: 400-800 pounds per cubic yard (medium)
- Mixed construction debris: 600-1,000 pounds per cubic yard (variable)
Master Strategic Loading Techniques to Maximize Capacity
This is where most jobsites fail. Teams throw debris into the dumpster randomly and wonder why they run out of space halfway through the project. Strategic loading can increase effective capacity by 30-50%.
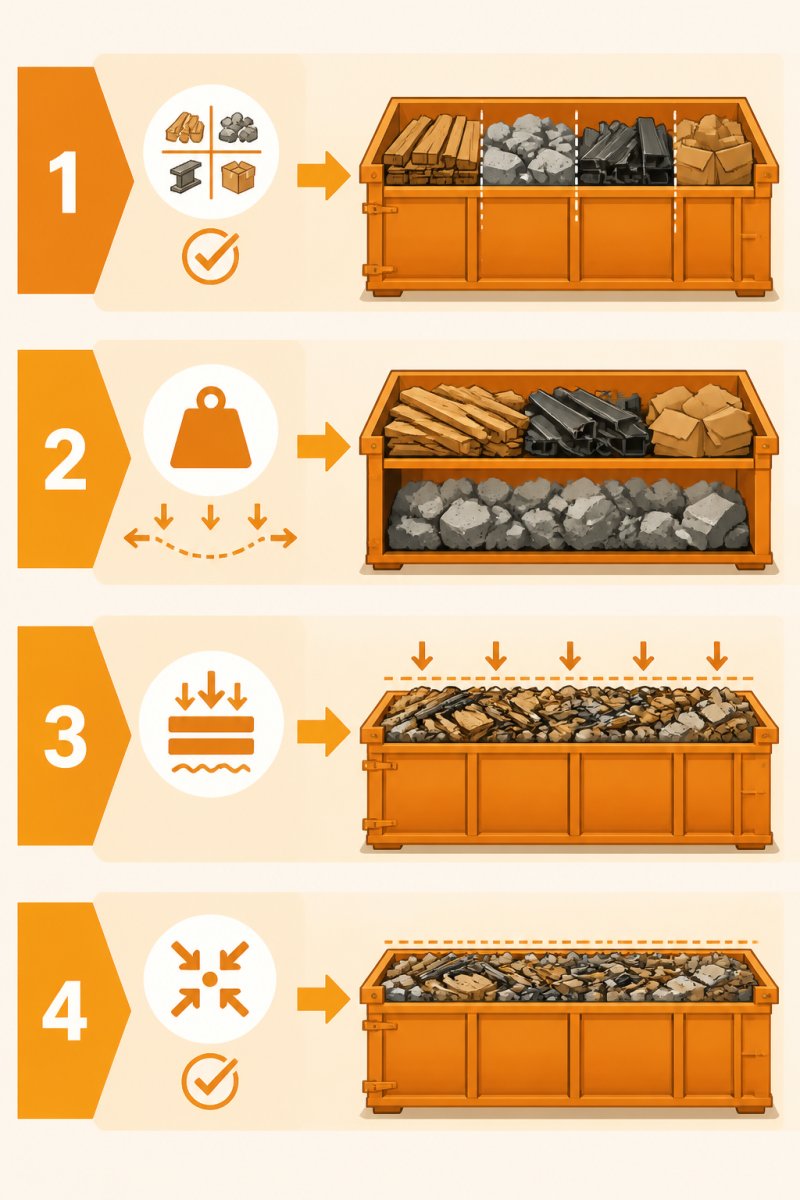
Step 1: Organize debris by material type
Before anything goes into the dumpster, sort it. Create staging areas on your jobsite for different material types.
This accomplishes three things:
- Improves packing efficiency: similar materials stack more compactly
- Enables recycling: separated materials qualify for diversion programs
- Protects your weight budget: you control how much of each heavy material enters the container
Typical staging categories:
- Heavy debris (concrete, masonry, roofing)
- Wood framing and dimensional lumber
- Drywall
- Mixed light debris (insulation, trim, packaging)
- Metals and recyclables (kept separate for value recovery)
Step 2: Load heavy materials first for load distribution
Start with the heaviest debris at the bottom. This creates a stable foundation and prevents lighter material from shifting or compacting under weight.
Load distribution prevents three common problems:
- Uneven settling: which creates air gaps mid-container
- Structural stress: on one side of the dumpster
- Shifting during transport: which can damage the truck and haul operator
Step 3: Compact and level debris throughout loading
Compaction is where optimization happens. Flatten and compress debris as you load. Don't just drop it and move on.
For materials that compress (drywall, wood waste, cardboard):
- Break it down: smaller pieces pack tighter than large ones
- Layer it flat: orient pieces horizontally rather than vertically
- Walk it down: use foot pressure to settle material between loads
- Press it down: have a crew member step on each layer as it builds
For materials that don't compress (concrete, masonry):
- Arrange tightly: eliminate gaps between pieces
- Nestle smaller pieces: into spaces between larger ones
- Level as you go: create a flat surface before adding the next layer
Compaction can increase usable capacity depending on material type.
Step 4: Fill air gaps and avoid overstuffing
The biggest waste of capacity comes from air gaps, empty space between debris pieces. Scan the dumpster as it fills. Identify gaps and fill them with smaller pieces or material that fits.
Common air gap sources:
- Between large concrete chunks: smaller pieces fit perfectly
- Under wood framing: lightweight material fills the space
- Along the sides: debris naturally falls toward the center, leaving side gaps
- At the top: uneven loading creates wasted space
Understanding On-Site Dumpster Compaction Benefits
On-site compaction changes the equation entirely. By crushing waste where it sits, you reduce volume dramatically. This means fewer hauls, lower disposal costs, and less jobsite clutter.
Dumpster Rental Costs and How to Reduce Them
Dumpster rental costs come from two sources: the base rental fee and overage charges. Understanding both helps you control expenses.
Overage fees and how optimization eliminates them
Overage fees occur when you exceed weight limits or require extra hauls due to poor planning. These fees are where costs spike unexpectedly.
Most rental agreements charge overage fees in these scenarios:
- Exceeding weight capacity: when you go over the limit
- Additional hauls: when one container isn't enough
- Extended rental periods: if the dumpster sits longer than contracted
Reducing hauling frequency through better planning
Fewer hauls mean lower total costs. Better planning reduces hauls.
Plan by project phase:
- Phase 1 (rough demolition): expect heaviest debris volume and weight
- Phase 2 (framing/structural work): medium volume, lighter material
- Phase 3 (finishing): lighter debris, less frequent hauling needed
- Phase 4 (cleanup): minimal volume, final pickup
Construction Waste Management Best Practices
Effective waste management extends beyond the dumpster. It encompasses your entire jobsite workflow.
Prohibited items and their impact on capacity
Certain materials cannot go into standard dumpsters. Hazardous waste, appliances, electronics, and regulated materials require separate disposal. Mixing prohibited items with standard debris can result in hauler refusal, fines, or project delays.
Common prohibited items in standard dumpsters:
- Hazardous materials: paint, solvents, asbestos, lead-based materials
- Appliances: refrigerators, air conditioners, water heaters (contain refrigerants)
- Electronics: computers, monitors, televisions
- Tires: require separate recycling programs
- Batteries: must be removed and recycled separately
- Propane tanks: pose explosion hazards
Workflow integration across project phases
Integrate waste management into your project schedule, not as an afterthought. Assign a crew member responsibility for debris staging and dumpster coordination.
Workflow checklist:
- Pre-project: communicate with your waste hauler about expected volume and timing
- Daily: designate a staging area; sort debris by type; compact where possible
- Weekly: assess dumpster fill level; schedule pickup before overflow
- Phase transitions: adjust staging and hauling frequency based on what's coming next
- Project close: plan final cleanup and pickup timing
Common Mistakes to Avoid When Loading Dumpsters
Learning from others' mistakes saves money and prevents project delays.
Conclusion
Optimizing jobsite dumpster capacity is straightforward once you understand the mechanics. Assess your waste stream, master strategic loading, plan across project phases, and integrate waste management into your workflow. These steps reduce costs, improve safety, and keep your jobsite running smoothly.
Frequently Asked Questions
What are the most common mistakes when loading a dumpster?
The biggest mistake is leaving air gaps between debris, which wastes cubic yardage and reduces effective capacity. Loading light materials first (like drywall or shingles) before heavy items causes shifting and instability. Overstuffing beyond the rim triggers overage fees and safety violations. Mixing prohibited hazardous materials with general debris can result in rejection of the entire load. Finally, poor weight distribution creates structural problems during transport. Proper segregation and load leveling prevent all of these issues.
How does on-site compaction improve dumpster capacity?
On-site dumpster compaction crushes debris in place, eliminating air gaps and consolidating material density. This process can reduce waste volume significantly, allowing more debris to fit in the same container. Compaction also reduces the number of hauls required by fitting multiple loads' worth of material into a single container. For jobsites handling heavy construction debris, roofing materials, or demolition waste, compaction directly lowers disposal costs and minimizes truck trips to the disposal site, improving jobsite efficiency and reducing your carbon footprint.
What materials should never be placed in a construction dumpster?
Hazardous materials including asbestos, lead paint, oils, solvents, batteries, and fluorescent lights are prohibited and can result in fines or load rejection. Appliances with refrigerant, tires, and certain electronics also violate disposal regulations. Wet concrete, propane tanks, and medical waste are similarly restricted. Including prohibited items not only creates legal liability but also damages the integrity of your load and wastes container space. Always verify your waste stream against local disposal site regulations before loading. Segregating hazardous materials keeps your jobsite compliant and maximizes usable capacity for legitimate debris.
How can proper loading techniques reduce the number of hauls required?
Strategic loading minimizes wasted space through organized debris segregation, heavy-first weight distribution, and continuous compaction. By filling air gaps and leveling loads as you go, you fit more material into each container. Planning your waste stream by material type and density before loading prevents last-minute reshuffling. Coordinating pickup scheduling with project phases ensures containers are full before removal. These techniques extend the time between hauls, reduce overall hauling logistics costs, and improve workflow optimization. Fewer trips mean less jobsite downtime and lower waste management expenses.
